Integrated Subject: History/ Art History
Level: 4
Project Time: 30 Minutes (assuming you prepared materials)
5-10 minutes spreading crayon shavings
5 minutes ironing and cooling
10 minutes cutting and hanging
Lesson Overview:
The students will first be introduced to the history of stained glass windows and shown pictures from different historical time periods. We will discuss where stained glass windows are normally found. Afterwards we will look at a few artists who are famous for their stained glass work.
Teacher Exemplar: |
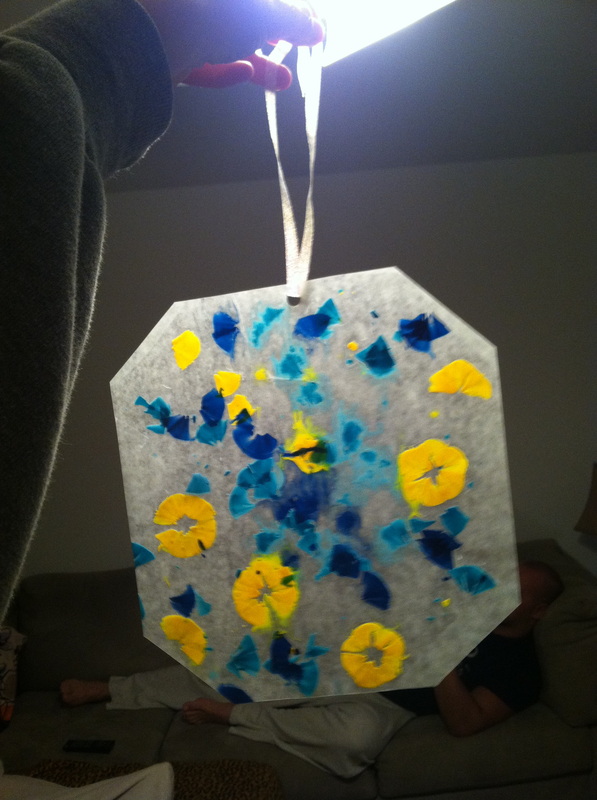
|
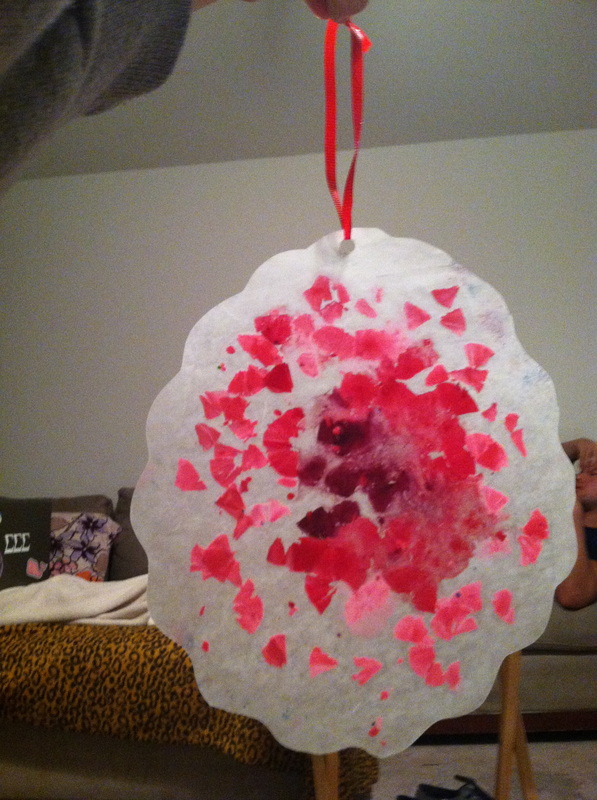
|
Vocabulary:
- Gothic Period: Started in the early 12th century and lasted till the end of 16th century. This period had an influence all over Europe and other western parts of the world.
- Renaissance: Literally means "Re-Birth"! It is the revival of art and literature under the influence of classical models in the 14th–16th centuries.
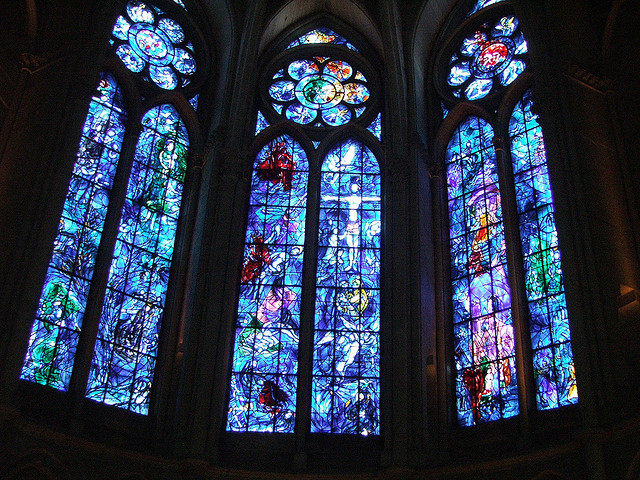
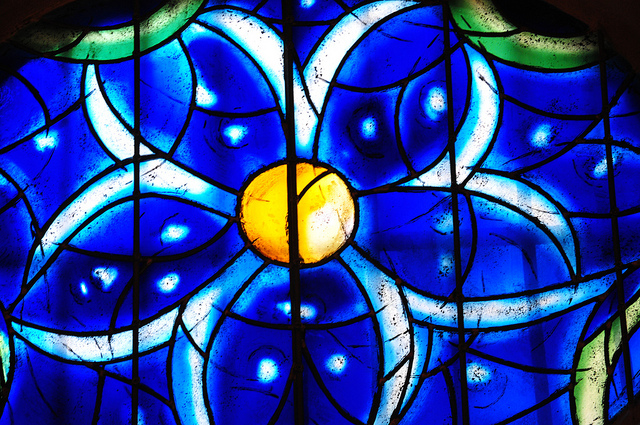
- Stained Glass: Colored glass used to form decorative or pictorial designs, notably for church windows.
- Color: A kaleidoscope of colors to create beauty. Soft colors were used to create a calming affect for the patrons, providing a relaxed atmosphere for prayer.
- Light: Throughout the day, the light creates patterns. As the day matures, the patterns appear in different locations and are altered by the intensity of the outside light.
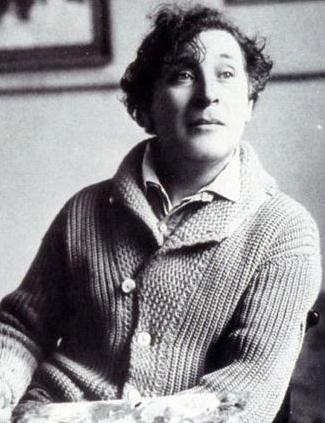
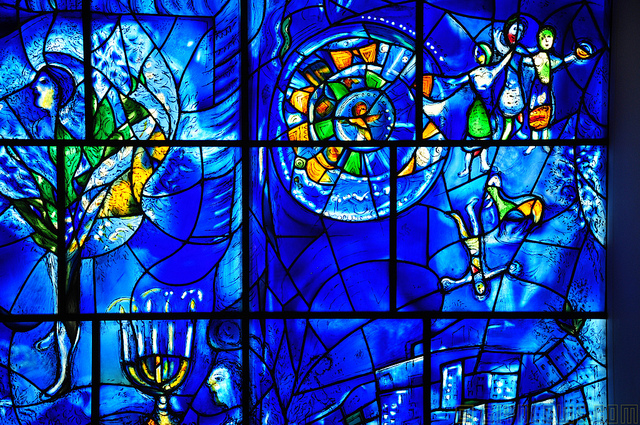
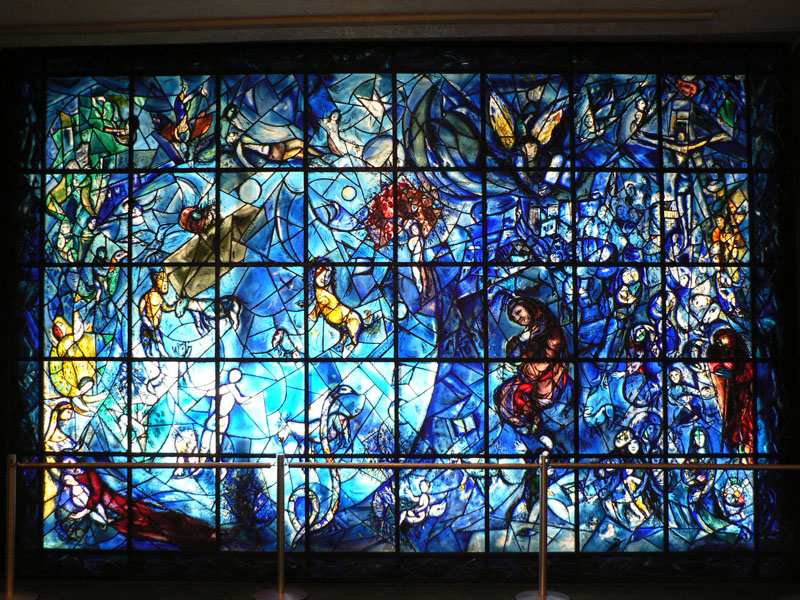
- Marc Chagall: Early modernist, Russian artist, who worked with every type of media including stained glass.
- Negative Space:
Standards:
Objectives- students will:
- Artistic Perception: students will learn the concepts of elements of art such as color, shape, and symmetry through the creation of "stained glass".
- Creative Expression: students will learn unusual ways of "blending" colors by melting crayon wax, cutting, and creating something aesthetically pleasant through the creation of their very own "stained glass".
- Historical and Cultural Context of the Visual Arts: students will learn about the history and evaluation of stained glass.
- Aesthetic Valuing: students will be able to criticize their artwork based on originality, technique and aesthetic appeal.
- Connections, Relationships, and Application: This project can easily be connected to any of the time periods discussed in a history class
Teacher Materials:
A power point containing vocabulary, procedure, history, famous examples, your example, and past student examples.
Materials:
- Crayons- paper peeled off
- Pencil sharpener
- Cardboard
- Cereal Box
- Wax Paper
- Iron
- Scissors
- Hole Punch
- Ribbon or Yarn
Procedure:
Crayon Shaving
Melting Station
Cutting Time
- Students will be given a piece of card board to lay underneath their project- this will act as a sturdy movable "desk" when they need to take their piece to the iron
- They will be given 2 piece of wax paper approximately 15"x15"
- Students will chose 2-3 different color crayons they want their stained glass to consist of
- Each student will have their own pencil sharpener
- First, Lay one piece of wax paper on top of your cardboard
- With their pencil sharpener and crayons, they will sharpen and empty the shavings onto the wax paper in a unique and original design that they create
- (Being sure not to clump too many shavings on top of each other- for it will not melt as well)
- Make sure students spread their shavings all over the wax paper leaving white area- noting that stain glass does have negative space.
- After creating their original design, students will then place the second piece of wax paper over their crayon shavings
- Students will then pick up their cardboard and wax paper and carefully take it over to the "melting" station
Melting Station
- Depending on amount of irons and how comfortable you are with your students using an iron, there are several ways you could do this, I found this to be the safest-
- Have either yourself or your student teacher be in charge of this melting station
- Have an iron ready and set on low heat
- Use a flattened / cut cereal box as your layer between the iron and the wax paper- an old pillow case is said to work as well
- take the two pieces of wax paper with shavings sandwiched between off the students cardboard and place onto your bottom cereal box
- place the other half of the cereal box on top of the wax paper and begin to iron
- Iron for about 30 seconds, lifting up the box and checking the wax paper underneath often
- Iron until all the crayon shavings have melted together
- Let the wax paper cool for about 10 seconds, then place back onto the students cardboard
Cutting Time
- Students now will cut their wax paper into a shape of their choice
- Suggest a square with a curvy boarder, a square with cut corners, an oval, a circle, etc. - something simple, not to dramatic
- Have your students punch a hole about a cm away from the top and lace a piece of yarn or ribbon through so their "stained glass window" will easily hang
Artist or Art History Focus:
Marc Chagall: (6 July 1887 – 28 March 1985) was a Russian artist associated with several major artistic styles and one of the most successful artists of the 20th century. He was an early modernist and created works in virtually every artistic medium, including painting, book illustrations, stained glass, stage sets, ceramic, tapestries and fine art prints.
|
|
|
|
Evaluation:
- Following Directions
- Originality
- Use of Color
- Overall Quality
